Gerrit
Gerrit is a code review tool built on top of git. It also manage permissions for repository access.
More informations about gerrit on https://www.gerritcodereview.com/
Please note that this feature depends on LDAP authentication.

Gerrit logo
Feature overview
The integration is meant to be as lightweight as possible so end users can use all power of Gerrit. Tuleap simplifies creation and management of the repositories, users and user groups. It doesn’t restrain gerrit features at all.
You can connect several Gerrit instances to one Tuleap server. One Gerrit instance can be connect to several Tuleap servers. A Gerrit server connected to Tuleap can also be used without Tuleap in full autonomy for projects, groups and user management.
Migrate a git repository to Gerrit
The gerrit migration panel can be found in git repository settings. You need to be a project administrator to have access to it.
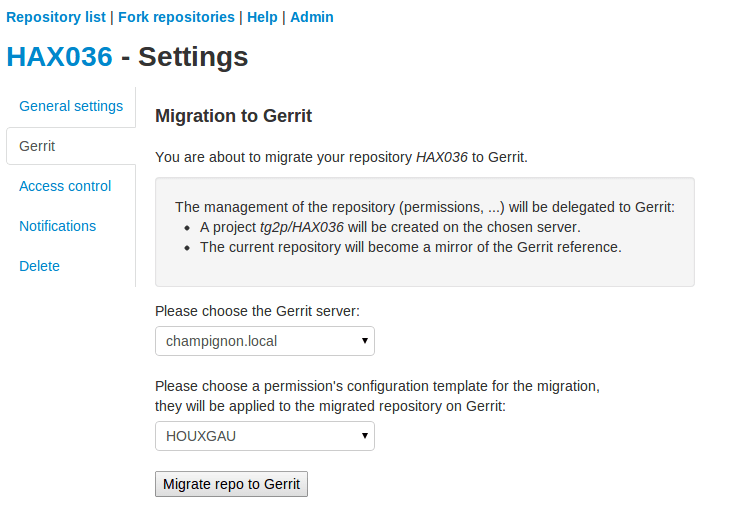
Example of a migration panel to gerrit
As a project administrator, you can migrate a git repository from Tuleap to Gerrit.
After replication, the sources will be replicated on the Gerrit server with a set of default permissions based on access rights at the time of migration.
On Tuleap side, as soon as the git repository is migrated, the repository is turned read-only (the reference is now on Gerrit). User can still browse the repository through the web UI, clone it or fork it but all write operations are blocked (even for admins).
However, all permanent changes (branches & tags) made on the corresponding Gerrit project are replicated to Tuleap. When developers make commits on Gerrit, there is a delay of a few seconds to see this commit replicated.
Please note however that review related things (patchsets, review & co) are not replicated. Technically speaking, only refs/heads/* and refs/tags/* are.
As a side effect of a project migration, all user groups are replicated to Gerrit too. See corresponding section below.
Project creation
In Gerrit terminology, a git repository is called “project”. To reduce confusion, we will talk about Gerrit project.
In following sections, we will take the example of an imaginary Tuleap project “mozilla” with two git repositories “thunderbird” and “firefox”.
Project admins migrate to Gerrit “firefox” git repository. After a couple of minutes, on Gerrit side there is:
One top level Gerrit project “mozilla”
One sub project “mozilla/firefox” created
The Gerrit project “mozilla/firefox” contains sources and is where developer will push for review.
The Gerrit project “mozilla” is a permission only project (no sources can be pushed into) and is meant to group all git repositories that come from the same Tuleap project. It’s convenient to define common permissions for several repositories.
Permissions
Tuleap comes with a default set of permissions for each Gerrit project. Those permissions are set at project migration only. No subsequent modifications of permissions are done by Tuleap.
Default permissions
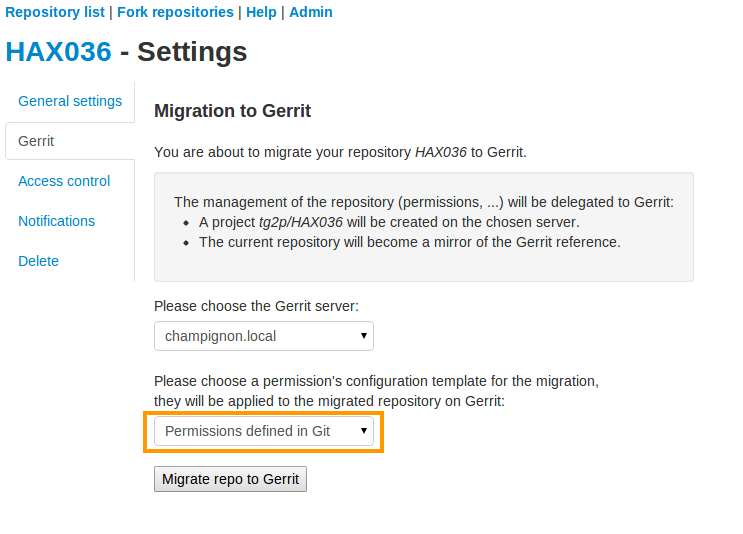
Issue migration with default permissions
Default Gerrit access rights are based permissions set on corresponding Tuleap git repository at migration. For details on on gerrit access rights please have a look to https://gerrit-documentation.storage.googleapis.com/Documentation/2.14.5.1/access-control.html
Read:
On ‘heads’
Read
label code-review -1..+1
On ‘for/refs/heads’
Push
On ‘tags’
Read
Write:
On ‘heads’
Read
Create
forgeAuthor
label code-Review -2..+2
label verified -1..+1
submit
push
pushMerge
On ‘for/refs/heads’
Push
PushMerge
On tags
Read
pushTags
Rewind:
On ‘heads’
Push +force
As project administrator, you can redefine the whole Gerrit permission scheme as you wish. If you need to create new user groups to tailor your workflow, see “User groups management” section below.
No permissions
If you already are a gerrit power user and don’t want default permission, you can also start with an empty permission scheme. Just untick “Migrate to gerrit the access rights defined in the Git plugin”
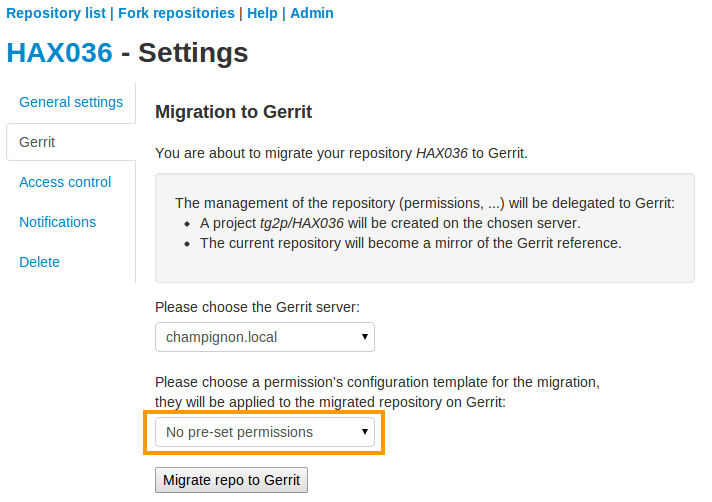
Migrate to Gerrit without default permission scheme
Use templates
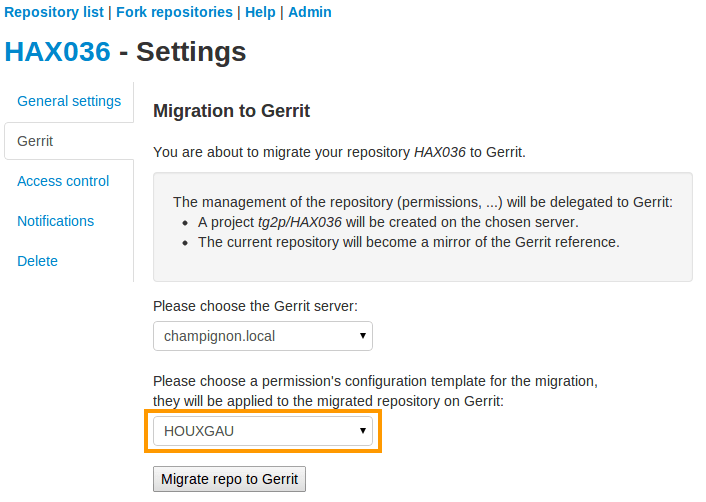
Migrate to Gerrit using a permission’s template
You can also define templates to be applied to refs/meta/config on Gerrit and which defines the access rights. To apply a template on migration, you simply have to select it within the proposed selectbox as you can see on the figure above.
These templates can be defined using the admin panel of Git. They must be valid ones in order to be correctly applied during the migration process. You can use the variable %projectname% which will be replaced by the project’s name during migration. For further informations regarding these templates, please refer to the Gerrit’s documentation.
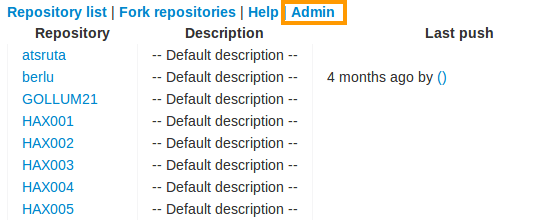
Git’s admin section
Setup parent projects (Umbrella)
This section assume you already know what basics of Gerrit project inheritance
This feature aims to address complex setups where a lot of Tuleap projects and git repositories are involved. The main objective is to simplify the definition of common rules and leverage on gerrit permission inheritance to apply them.
Let’s take again our mozilla based example:
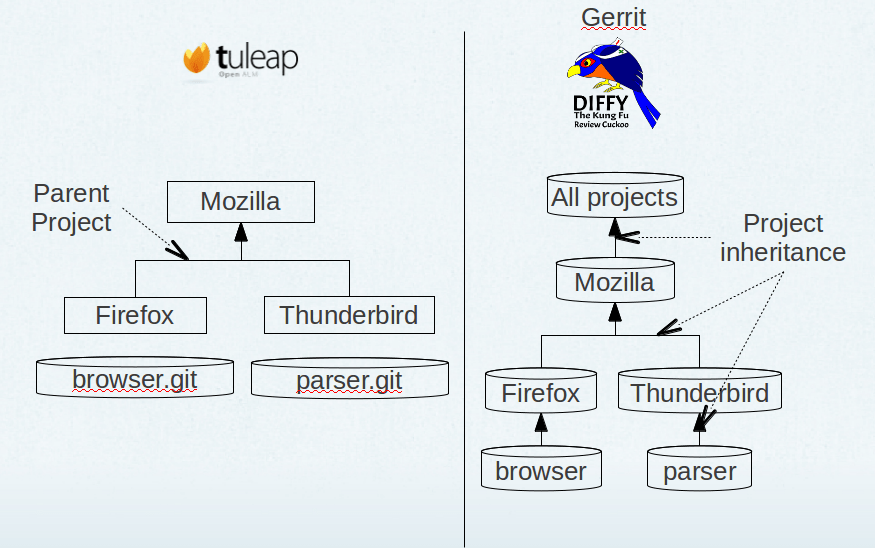
Tuleap/gerrit umbrella projects mapping
On Gerrit side, at mozilla level, I can define common permissions rules that will apply on all repositories (hence browser and mbox in our example). Those common rules might state that:
any member of mozilla organization is allowed to propose a contribution on any mozilla repository
any QA mozilla team member is allowed to -2 contribution on any repository
…
This inheritance is set automatically during repository migration as long as there is a parent project defined. This definition is done as project admin, in admin welcome panel, see screenshot below:
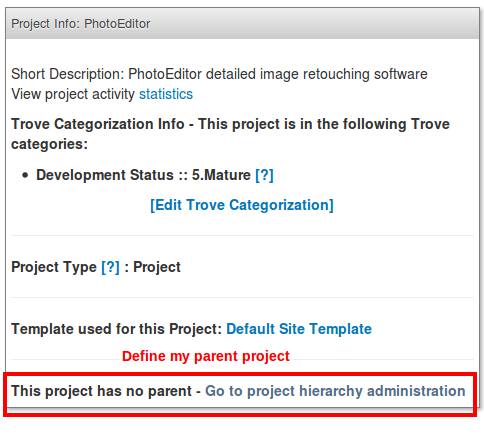
Define a parent project
User groups management
User group management helps to keep consistent your teams between Tuleap and Gerrit. When someone join or leave your team, just add or remove it in Tuleap project and it’s automatically propagated to Gerrit.
Warning: It’s not safe to update those user groups directly in gerrit. If you add or remove someone manually Tuleap might undo this change without prior notice. If you ever need to have a user group with custom membership you should create a dedicated group in gerrit.
The user group management follow the same naming pattern than projects. Given I have a “mozilla” Tuleap project with one special user group “Developers”, I will get on Gerrit server:
mozilla/project_members
mozilla/project_admins
mozilla/Developers
The two first user groups are created by default out of “Members” and “Admins” list.
As soon as one git repository was migrated to Gerrit. All modifications done to Tuleap project membership is replicated:
When I create a new Tuleap user group, a new Gerrit user group is created
When I add users as members of a user group on Tuleap, they became members of the corresponding user group on Gerrit
When I remove members on Tuleap, they are removed from corresponding Gerrit group
When I create a binding between two user groups in Tuleap, the two groups are linked in gerrit (even if the user group, source of the binding doesn’t exist on Gerrit yet).
When I remove a binding between two user groups in Tuleap, the source group is no longer included in the target group and all members of the source group are added into the target group.
Manage user SSH keys
To help people to start working with Gerrit, user ssh keys stored in Tuleap can be imported on Gerrit server.
As soon as a user belongs to a Tuleap project with at least one git repository migrated to Gerrit, all modifications done to user ssh keyring are propagated to the corresponding user account on the server. In other words, when user add an ssh key on Tuleap, the ssh key is added on Gerrit server and vice et versa.
This key management doesn’t override Gerrit ssh keys, it will not delete keys Tuleap doesn’t manage.
Note: the first connexion between Tuleap user account and Gerrit user account is not done automatically. Each user have to go on Tuleap “Account Maintenance” page and click “Push SSH keys” button. All future operations are automated.
Delete or disconnect from Gerrit
Once a repository is migrated, you can decide to revert this action and “disconnect” gerrit and tuleap.
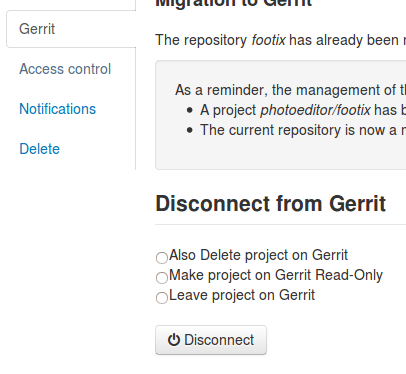
Disconnect & delete Gerrit project
There are three options:
Delete
Disconnect
Disconnect and keep read-only
In all cases, it means that Tuleap repository will be writable directly again (you can change permissions, you can push, etc).
Those actions are available on the “Gerrit” pane in git repository settings, there is a small delay between disconnect request and application.
Delete
Delete option is only possible if site admin configured “deleteproject” plugin on gerrit side (see Setup).
If delete is possible, it will be proposed as a checkbox next to disconnect button.
Deletion will delete the corresponding Gerrit project (and only this project). All data (git commits, reviews, changeset, etc) will be permanently erased.
After a deletion, if you ever want to re-migrate a repository, it’s possible (it’s not the case with Disconnect).
Disconnect
If you choose not to delete, the Gerrit project AND the Tuleap repository will be writable in the same time.
However, the gerrit project will not be replicated. It’s likely that you will end-up with a fork: two different, incompatible versions of the same project. This is risky but it can be useful in scenario like:
you migrate to gerrit
your team fail to find the right workflow
you choose to disconnect for a time, but keeping Gerrit project for tests until the workflow and the team are ready
then you delete the gerrit project and start again.
With a simple disconnect, you cannot re-migrate the git repository. You will be asked to delete it beforehand.
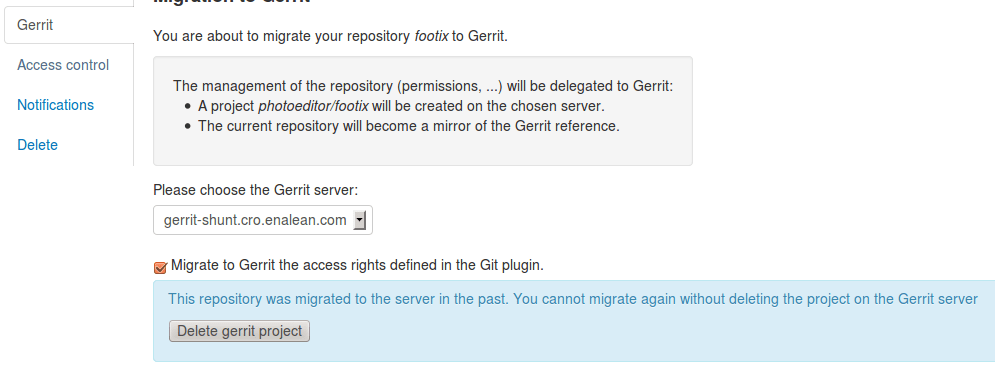
Before being able to re-migration, I should delete the Gerrit project.
Disconnect and keep read-only
A variation of disconnect is to “Disconnect and keep read-only”.
As expected, the corresponding Gerrit project will be turned in read only mode.
It’s useful for archiving purpose.
Setup
This section is for Tuleap site admin and explain how to setup Tuleap/Gerrit integration. If you are developer, you don’t have to read this section.
Prerequisites:
Gerrit, minimal version 2.8. Recommended version: 2.12.x (at time of writing)
LDAP plugin must be installed, configured and active. Both Tuleap and Gerrit rely on LDAP for common user management.
From now on, you will need:
What |
Value |
|---|---|
a tuleap instance |
my.tuleap.server.net |
a gerrit instance |
gerrit.instance.com |
your local workstation |
workstation |
the gerrit general administrator |
admin-my.tuleap.server.net (must be a valid LDAP user) |
the gerrit super administrator |
gerrit-adm (must be a valid LDAP user) |
Install and configure Gerrit server
- Follow the steps here up until and including the section:
Configure LDAP integration
To connect as gerrit-adm, you first need to configure gerrit to authenticate with LDAP.
Edit
etc/gerrit.configto use LDAP auth. Example:[auth] type = LDAP [ldap] server = ldap://myldap.server.com accountBase = ou=People,dc=cro,dc=enalean,dc=com groupBase = ou=Group,dc=cro,dc=enalean,dc=com accountFullName = cn
Restart or stop/start your gerrit as explained in the gerrit quick_install documentation.
Create the gerrit administrator account
Start the gerrit instance, go to the web ui and create the administrator account (the first account registered is the administrator) for
gerrit-adm.Through the gerrit web ui, go to the settings and upload your very own local ssh key.
# copy the output of this and paste it in gerrit
you@workstation$ cat $HOME/.ssh/id_rsa.pub
This gives you ultimate rights over
gerrit.instance.comas a super administrator. It’s bad practice to use this account for anything but major changes so we will add a general administrator account for taking care of the day to day administration ofgerrit.instance.com.
Configure gerrit replication
To configure gerrit replication we need to use the gerrit replication plugin. This plugin comes as part of the gerrit package that you have downloaded. There are two steps to using this package. Let’s assume you have already followed the steps in the link above and have a folder called _gerrit_testsite_ where all the gerrit files are located.
First login as
admin-my.tuleap.server.netongerrit.instance.comand create the groupmy.tuleap.server.net-replication. Do not add any users to it. Make group visible to all registered users:Go to
Groups > Create New GroupCreate
my.tuleap.server.net-replicationThen go to
Groups > List > my.tuleap.server.net-replication > GeneralTick the Group option
Make group visible to all registered usersand save
Now go back to the gerrit package you downloaded. You inflate the jar of the replication plugin into
gerrit_testsite/plugins/.gerrit@gerrit.instance.com$ unzip -j gerrit.war WEB-INF/plugins/replication.jar -d gerrit_testsite/plugins/
Finally, you need to configure the plugin. Go to
gerrit_testsite/etc/and create a file calledreplication.config:gerrit@gerrit.instance.com$ cd gerrit_testsite/etc gerrit@gerrit.instance.com$ touch replication.config
In this file put the following contents
[remote "my.tuleap.server.net"]
  url = gitolite@my.tuleap.server.net:${name}.git
  push = +refs/heads/*:refs/heads/*
  push = +refs/tags/*:refs/tags/*
  authGroup = my.tuleap.server.net-replication
Generating http password
You need to generate an http password through the Gerrit web interface for Gerrit admin user admin-my.tuleap.server.net.
To do this, log-in into your Gerrit instance as admin-my.tuleap.server.net, go to settings menu, and choose http password.
Then click on generate.
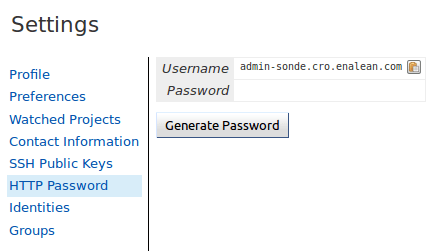
Connect Gerrit and Tuleap servers
Setup administrator account for Tuleap
As codendiadm on Tuleap server generate a new SSH key for gerrit:
codendiadm@my.tuleap.server.net$ ssh-keygen -P "" -f /home/codendiadm/.ssh/id_rsa-gerrit
On Gerrit server log-in with the LDAP credentials for
admin-my.tuleap.server.netand give it the SSH public key you just created (/home/codendiadm/.ssh/id_rsa-gerrit.pub)On Gerrit server, log back in as
gerrit-admand giveadmin-my.tuleap.server.netAdministrator rights: In the interface, go toGroups > List > Administratorsthen addadmin-my.tuleap.server.netin the input box and click onAdd.
Grant write accesses to administrators
On Gerrit server, as Administrator, go to Projects > List > All-projects > Access.
Look for the reference refs/meta/config
Add
Readpermission to GroupsAdministrators
Add a new reference refs/meta/*
Grant
ReadandPushpermission toAdministratorsThis is necessary to allow Tuleap to update theproject.configof any project
Look for the reference /refs/*
Add
Forge Committer IdentityandForge Author Identitypermissions for the groupAdministrators(this will allow Tuleap to push commits it’s not the direct author of).
Configure the email of the administrator
By default, the admin email of your Tuleap instance is hard coded to something like codendiadm@my.tuleap.server.net which by default has no mailbox.
This value is set in /etc/codendi/conf/local.inc under the vatiable $sys_email_admin.
The current value of the Tuleap admin email can be found by logging-in to Tuleap as admin and going to the My Account page.
If the value of email does not correspond to a valid mailbox then this step cannot be done via the web UI.
From now on, we will refer to the aforementioned email as admin_email.
In essence, what this step achieves is to have matching emails for the admin-my.tuleap.server.net account on Gerrit and the Tuleap admin user that pushes content to gerrit.
We can directly use the gerrit REST API to configure the admin-my.tuleap.server.net email:
curl --digest --user admin-my.tuleap.server.net:http_password
     -X PUT gerrit.instance.com/a/accounts/self/emails/admin_email
     -H "Content-Type: application/json;charset=UTF-8"
     -d'{"no_confirmation": true}'
Note: there may be permission issues when doing this with later versions of Gerrit. You will need to either
give Administrators greater rights or fall-back to the other method (above).
Integrating Tuleap and Gerrit
Shell into the box on which your Gerrit instance is running and grab the output of the default public key that will be used for the replication:
gerrit@gerrit.instance.com$ cat ~/.ssh/id_rsa.pub
If it doesn’t exist then you need to create it via ssh-keygen as above.
As site admin on Tuleap, go to
Admin > plugins > git pluginand add a gerrit server:
Key |
Value |
|---|---|
Host |
|
Port |
|
Login |
|
Identity File |
|
Replication SSH Key |
copy and paste the output of the public key |
Gerrit server version |
check the right value regarding your gerrit server |
Http password |
copy the gerrit http password |
Authentication type |
Either Digest (default) or basic. This depends of the configuration of your gerrit server. If you didn’t set |
Here is a view of the Tuleap git plugin administration where you are able to add new gerrit servers:
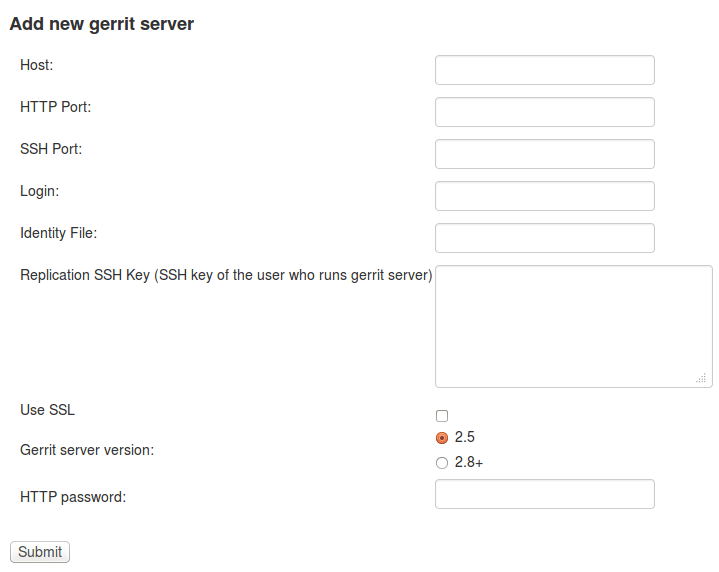
The form in Git plugin administration to add gerrit server.
Finally, it is important for the codendiadm user on
my.tuleap.server.netto havegerrit.instance.comas part of its known hosts and vice versa. To ensure this:# root on Tuleap root@my.tuleap.server.net$ ssh -p 29418 -i /home/codendiadm/.ssh/id_rsa-gerrit admin-my.tuleap.server.net@gerrit.instance.com gerrit -h # codendiadm on Tuleap codendiadm@my.tuleap.server.net$ ssh -p 29418 -i /home/codendiadm/.ssh/id_rsa-gerrit admin-my.tuleap.server.net@gerrit.instance.com gerrit -h # Gerrit user on Gerrit server (replication) gerrit@gerrit.instance.com$ ssh gitolite@my.tuleap.server.net
Enabling Gerrit project deletion via Tuleap
[This plugin comes from https://gerrit.googlesource.com/plugins/delete-project]
From Tuleap 6.5 onwards, it will be possible to delete a Gerrit project after it has been disconnected from Tuleap. For this option to be present in Tuleap, the Gerrit server needs to have an additional plugin.
First, download the plugin:
Gerrit 2.8: https://tuleap.net/file/download/92
For later version, you have to build the plugin yourself.
To install the plugin, put delete-project.jar in the ‘plugins’ folder of your Gerrit instance then run
curl --digest --user admin-my.tuleap.server.net:http_password
     -X POST tuleap.server.net/a/plugins/deleteproject/gerrit~enable
Restrict a Gerrit server by project
Starting Tuleap 9.5, each gerrit server can be restricted by project. This can be handy if you want to segregate gerrit server usage.
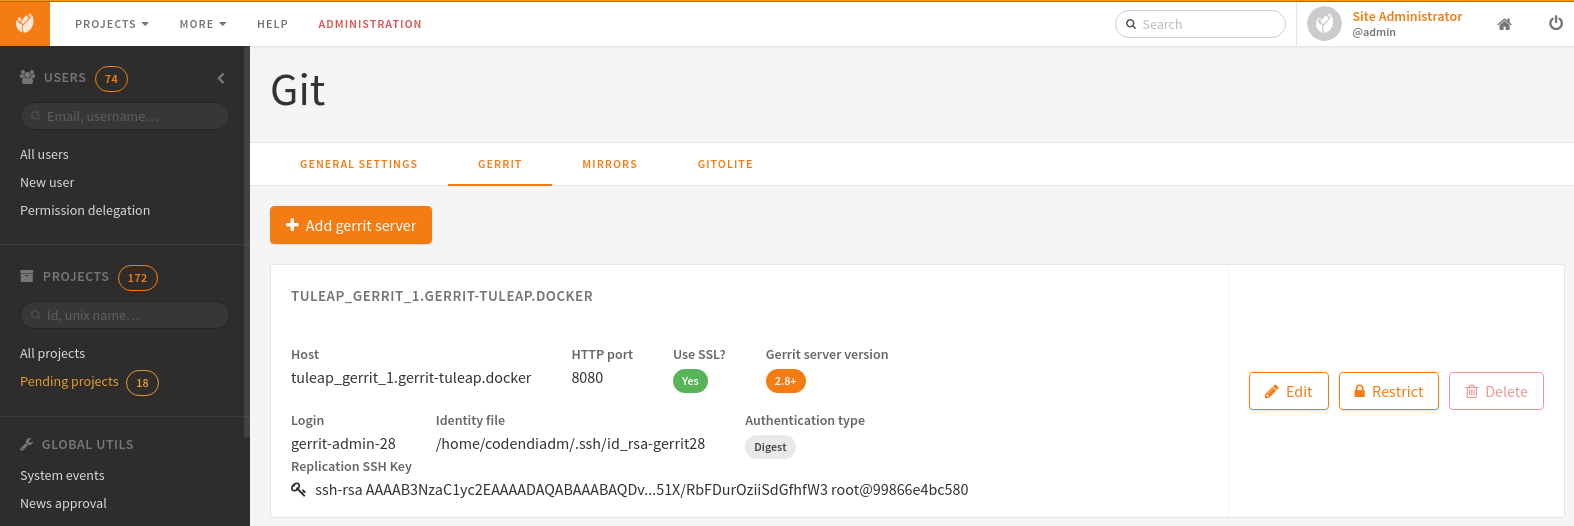
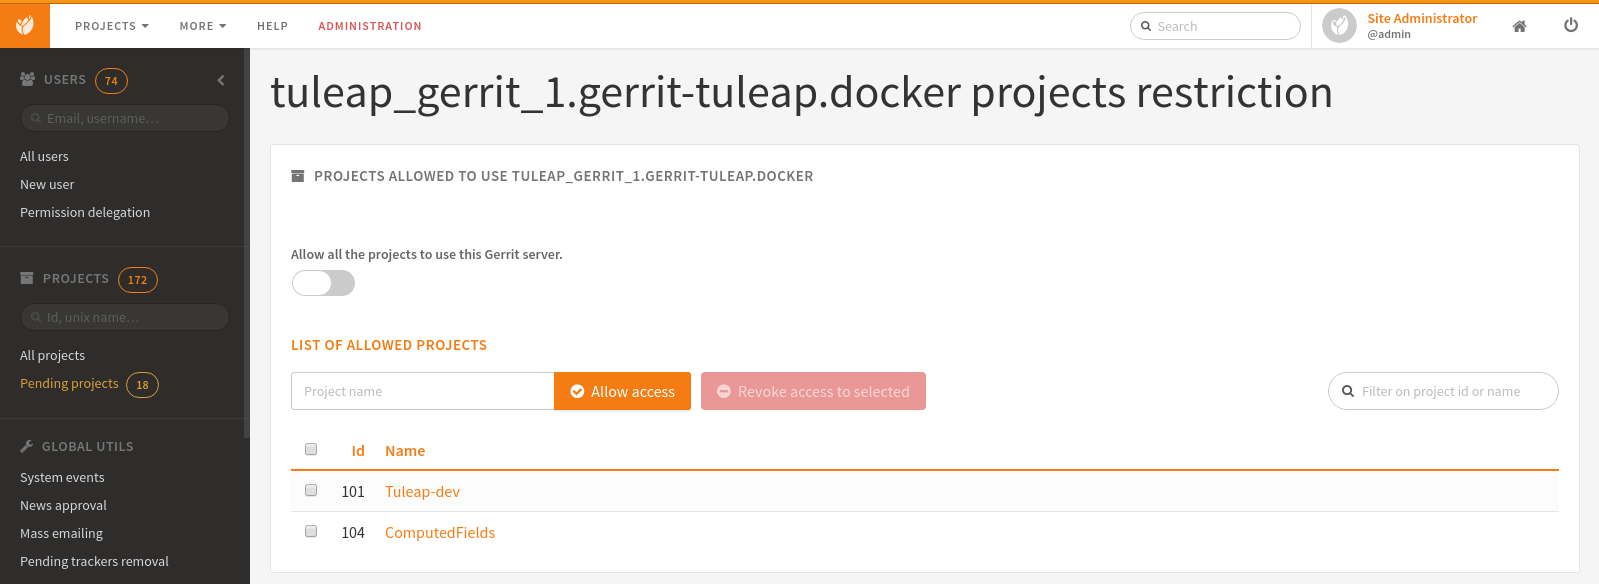
This means that only the selected projects will be able to migrate a Git repository into this Gerrit server. The projects that have at least one Git repository migrated into this Gerrit server will be automatically set when restricting a Gerrit server. A project that have at least one Git repository migrated into this Gerrit cannot be removed from the restriction.
The Gerrit server restriction is also taken into account in the REST API.
